Android 4.4 introduced more subtle use of colour throughout the OS and provided new guidance on using colour in your applications to provide better branding (see this episode of ADiA for more discussion). This means that the onus is now on you as a designer/developer to inject some colour into your app to make it stand out.
Use your brand color for accent by overriding the Android framework’s default blue in UI elements. Android Design site
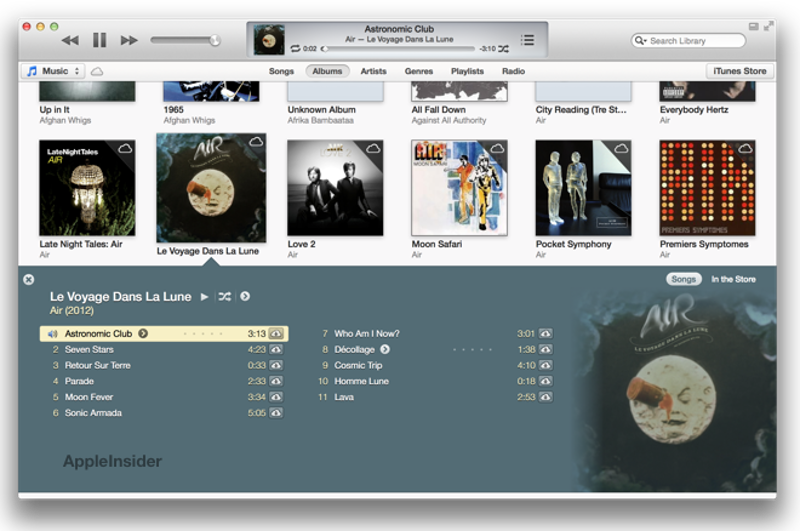
A simple way to do this is by add a custom background to your Action Bar, but I wanted something a bit more dynamic for an hobby app I’m currently writing. One of the best examples of adapting to colour is iTunes which picks out the colour scheme from an album’s artwork, and then colours the tracklist popout to suit.
So I set about implementing this on Android.
Basic theory#
After searching around on the web I found quite a few open source implementations in other languages. The best implementation I found was a Javascript library called Color Thief which taught me the basics of this technique which I’ve tweaked to my needs.
Quantize#
The first step is the quantization of your source image. In layman terms, this mean decreasing the number of colours used in the image. If you like animated GIFs then you will have seen the effect as GIFs can only have a 8-bit palette, therefore can only use up to 256 discrete colours per frame.
For our purpose, I needed to reduce the palette down even further to a small amount of dominant colours. From there we can take the generated palette and work out the important colours. More on that later.
For now though I had to decide which quantization algorithm to use. Color Thief uses a modified version of Median Cut Quantization (MCQ) ingeniously called Modified Median Cut Quantization (MMCQ). You can find more information on MMCQ here. Other popular quantization techniques include NeuQuant and OctTree
I found a Java MCQ implementation on GitHub from the book Principles of Digital Image Processing which was easy to adapt for Android.
I decided to go with MCQ as it has a few nice characteristics for my purposes:
- It’s quick. Much quicker than NeuQuant, and much much quicker than OctTree. This is obviously important when we’re running on a handheld device.
- Internally it’s uses a histogram, therefore each colour (cube) has a count attached to it. This is handy later on for sorting.
MCQ does not produce the best quality images though, but as I only need the colour palette and don’t display the quantized image; that’s fine.
Results#
So here are the results, using Color Thief’s example images. Remember that MCQ uses a histogram? Well we can sort the palette based on how often the colour is used, and it turns out that a simple sorted list of the palette seems to work OK. This can definitely be improved upon though.
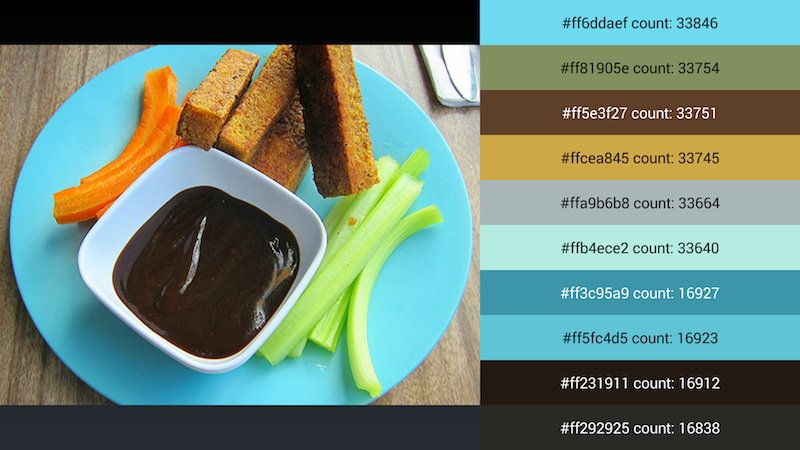
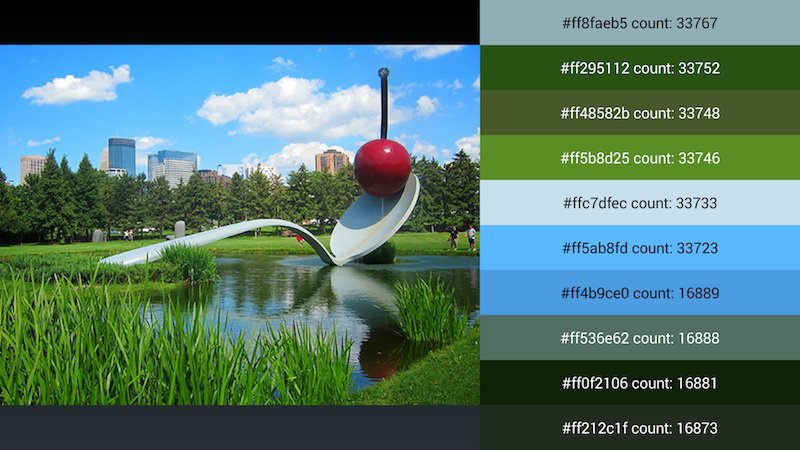
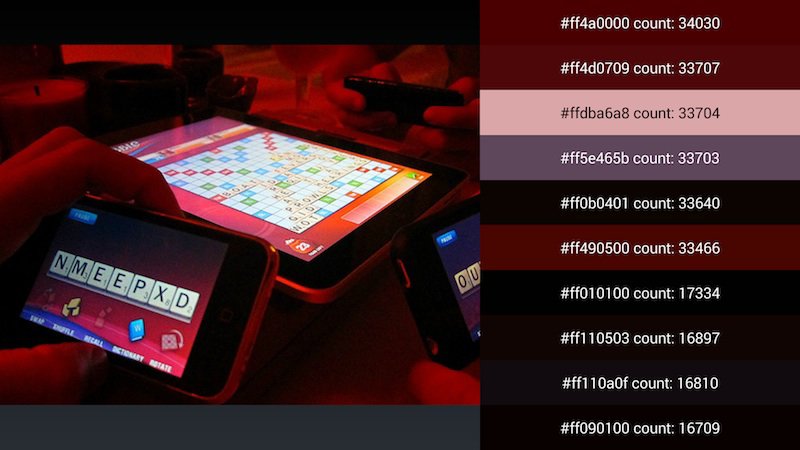
The results are slightly different from what Color Thief produces:
- Mine wins as it picks out the blue as the dominant colour.
- Color Thief wins as it picks out the blue, silver and green as the top colours.
- Color Thief wins as it does not pick out varying shades of dark grey. Something to improve upon.
Part 2 of this post will be talk about how to better pick out the dominant colours from the palette, and will be published next week.
Example#
Here’s the technique being used in my hobby app. It generates the colour palette from a movie’s poster, and then updates the rating bar to match.
EDIT : You find the second part of this post here: